TRAINING & PRESENTATIONS
New Student Orientation

TigerTech Introduction is a hands-on learning training for new students hosted and presented on Canvas. This in-person training offers individual support on everything IT has to offer.
- Students get recommendations on tech and where to get free or discounted hardware and software.
- Learn about accounts for Wi-Fi, cloud, and network storage access.
- Get information about TV services, available technology tools, and open computer labs.
- Learn how to contact ITS and what support is available to students.
Excel Essentials
Training Overview
- Workbooks vs worksheets
- A workbook is a document. A worksheet is a section in the document.
- Menus & Cell Styles
- Review Quick Access Toolbar, Tabs, Ribbon Menu, and Cell Styles.
- Worksheet option
- Creating, renaming, and deleting worksheets.
- Simple formulas and formulas between sheets
- Insert basic formulas using fx, and using formulas between sheets.
- Vlookup
- When and how to use Vlookup.
- Combining and Separating Columns
- Using =(first column)&” “& (second column) and Text to Columns.
- Merging data from two sheets and two workbooks.
- Use consolidate to merge data between two sheets or workbooks.
- Creating Pivot tables and charts
- Label all fields, select table placement, click the Insert tab, and select PivotTable. Insert a table by selecting data, clicking the Insert tab, selecting Recommended Charts, and selecting the desired chart.
- Protecting Workbooks
- Protect the workbook by clicking the Review tab and selecting Protect Workbook. Enter the desired password and click OK.
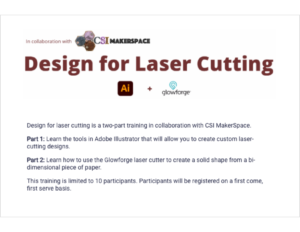
Design For Laser Cutting (Adobe Illustrator & Glowforge)
Training Overview
Design for Laser Cutting is a two-part training in collaboration with Trinity University MakerSpace.
Part 1: Learn the tools in Adobe Illustrator that will allow you to create custom laser-cutting designs.
- Why use Adobe Illustrator
- Adobe Illustrator is used to create vector-based drawings, illustrations, icons, logos, and more. These files can be exported to use in print and digital mediums.
- What is Glowforge
- Glowforge is a 3D laser printer. You can create using materials like paper, wood, leather, felt, fabric, acrylic, and more.
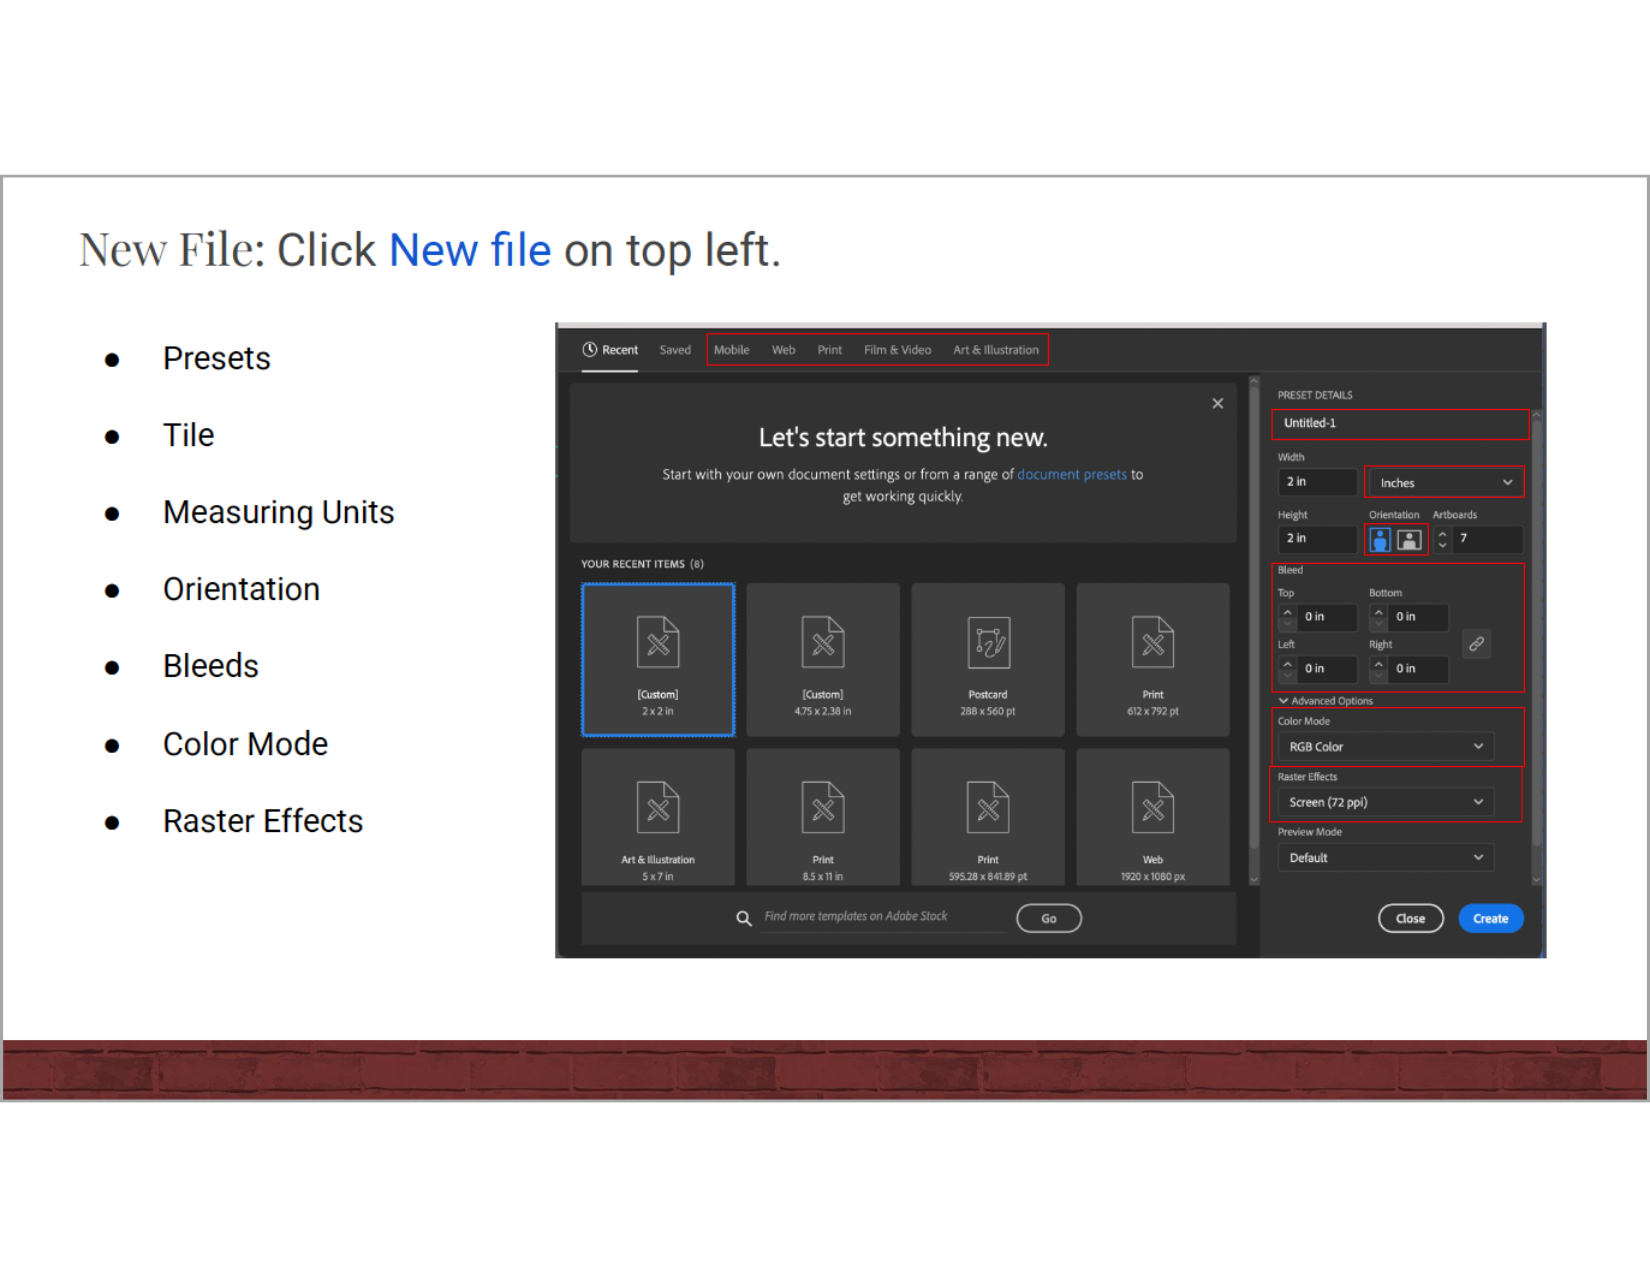
- Selecting a box for printing
- Go to templatemaker.nl, select a box to print, and open the file in Illustrator.
- Adding text and shapes in Illustrator
- Add text or shapes, work with Properties, Toolbar, and Appearance windows.
- Uploading box to Glowforge
- Go to https://glowforge.com/, and upload the file.
- Setting the box for printing
- Set up print material, material thickness, engraving, speed, and precision power.
Part 2: Learn how to use the Glowforge laser cutter to create a solid shape from a bi-dimensional piece of paper.
Below are some examples of the designs students created during this training.


Adobe Express
Training Overview
- Why use Adobe Express
- Adobe Express is a mobile and online design app that simplifies the sharing of content on social media.
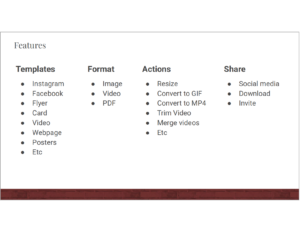
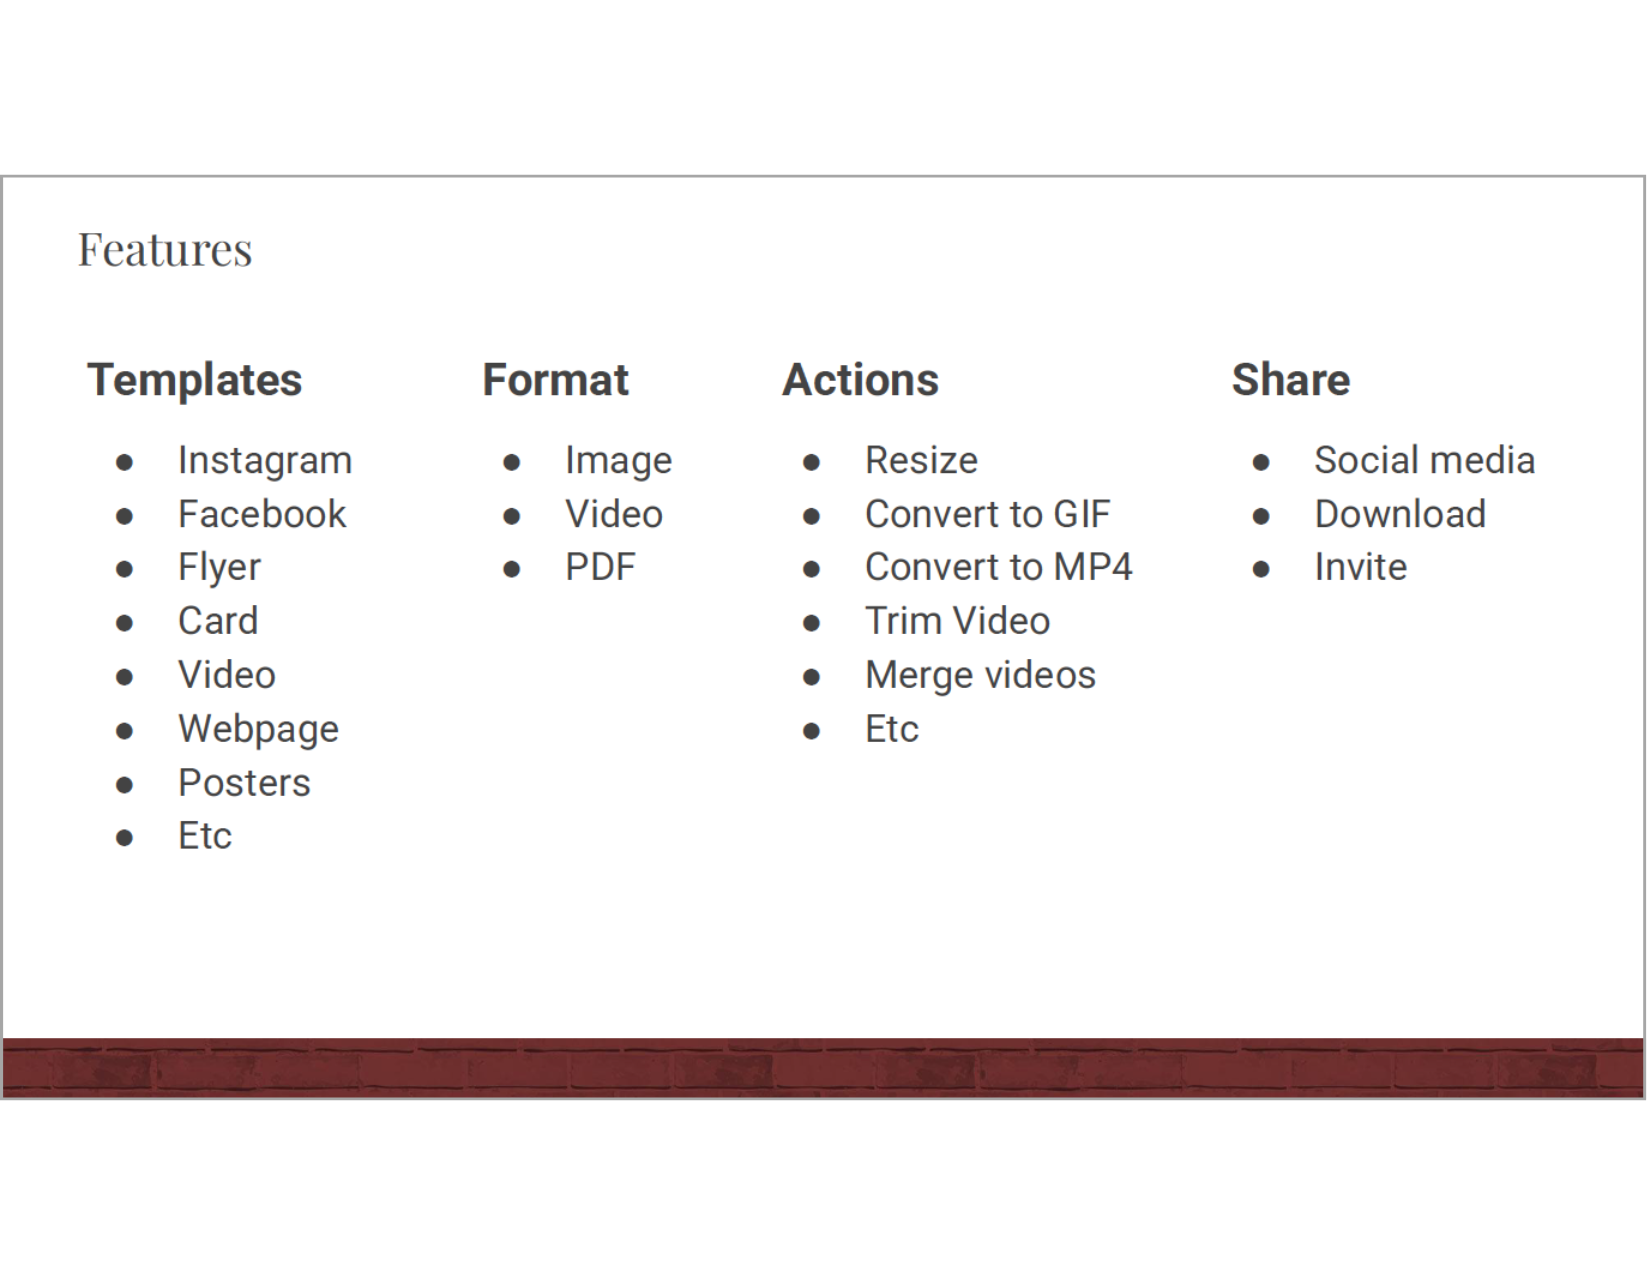
- Templates
- Instagram, Facebook, Flyers, Postcards, Video, Webpage, Posters, etc.
- Actions
- Resize, convert to GIF and MP4, trim videos, merge videos, etc.
- Demo
- Select a postcard, select design elements, and text.
- How to export
- Share on social media, download, and invite.


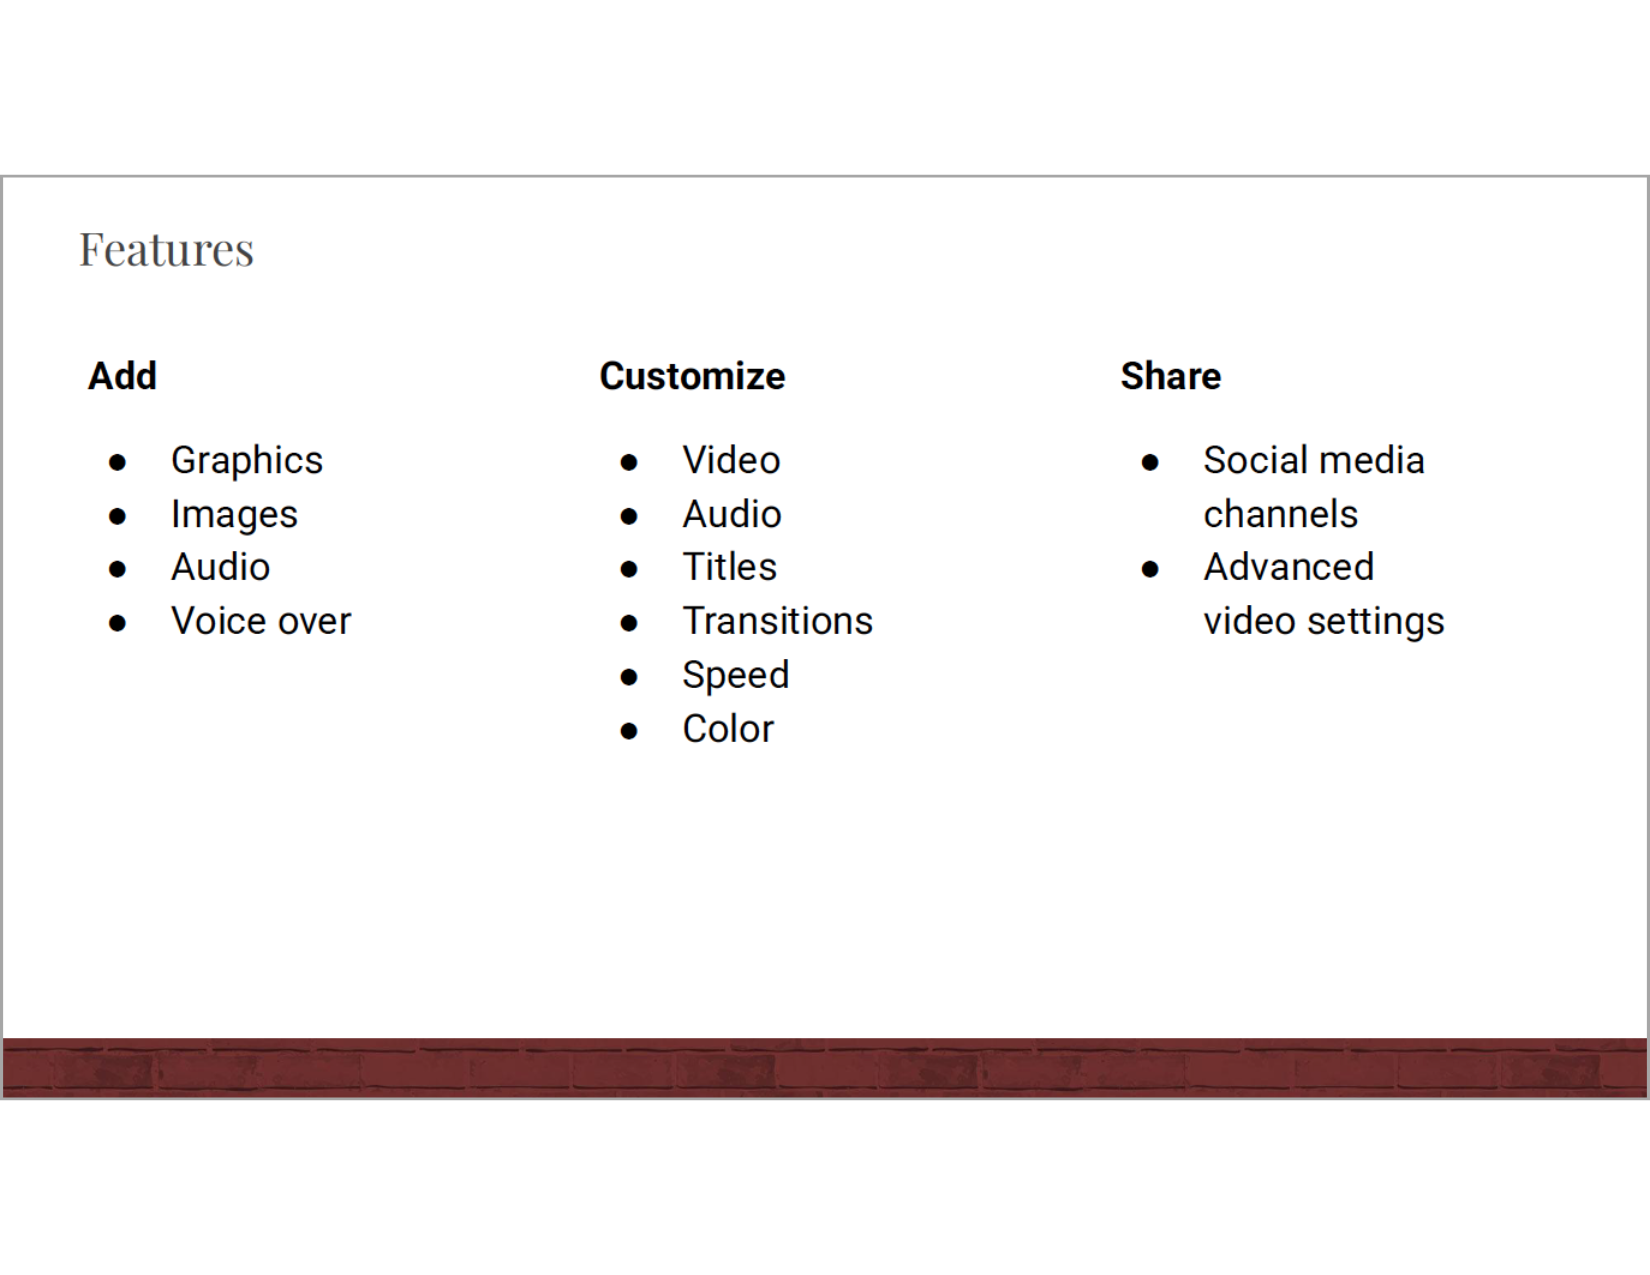
Adobe Rush
Training Overview
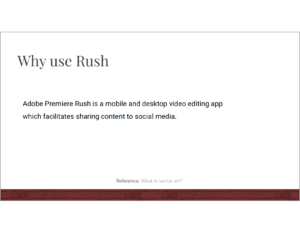
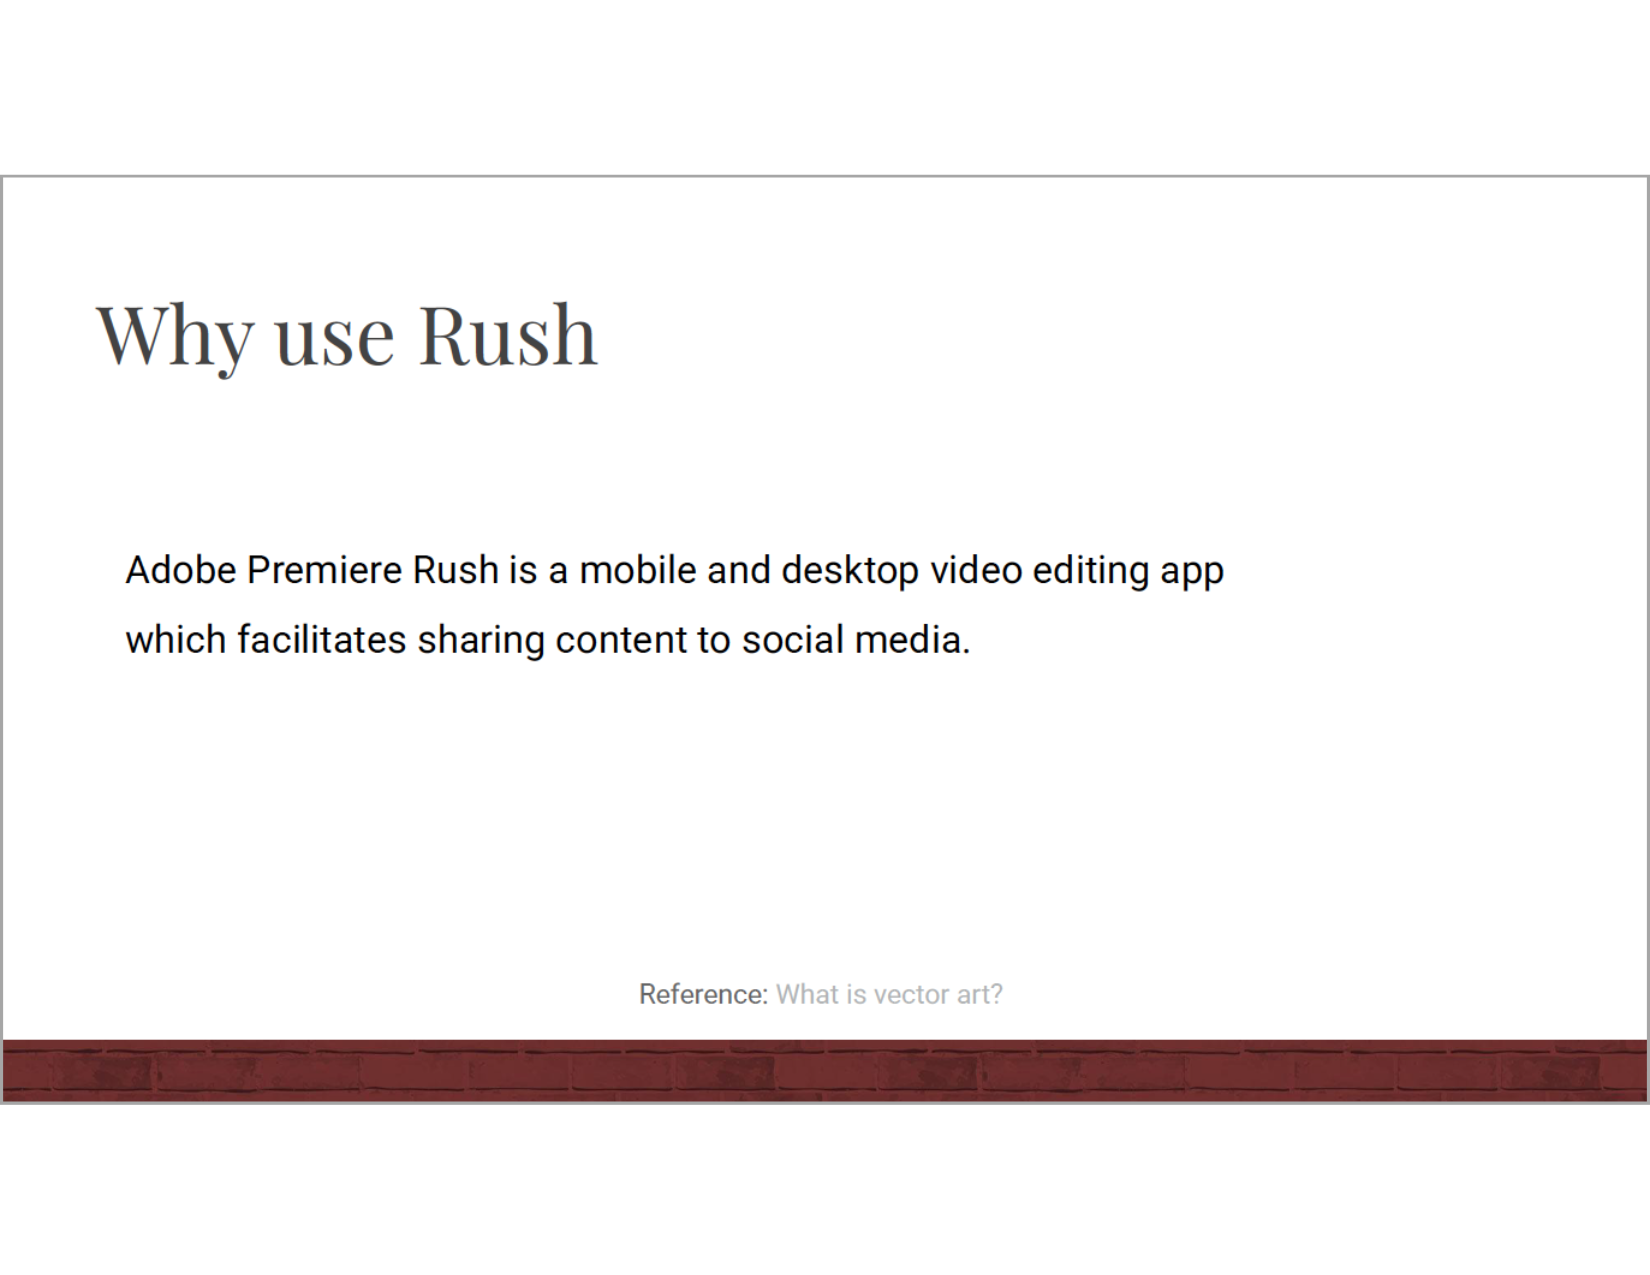
- Why use Adobe Rush
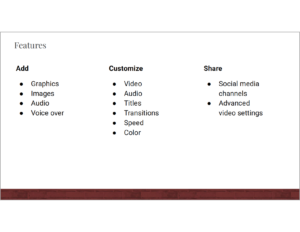
- Most used elements
- Graphics, images, audio, and voice over.
- Most used editing tools
- Video, audio, titles, transitions, speed, and color.
- Demo
- In the demo, you will create a new project, import a video, cut a video, add a logo, import an image and crop and rotate, pan and zoom on the image, add transitions, add graphics, and audio.
- How to export
- Learn how to export based on how the file will be used.


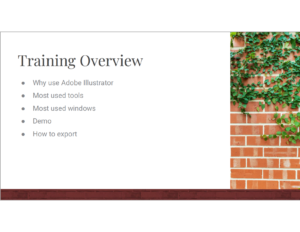
Adobe Illustrator
Training Overview
- Why use Adobe Illustrator
- Most used tools
- Selection, direct selection, pen, rectangle, paint, type, eraser, fill, and stroke.
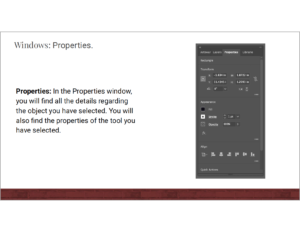
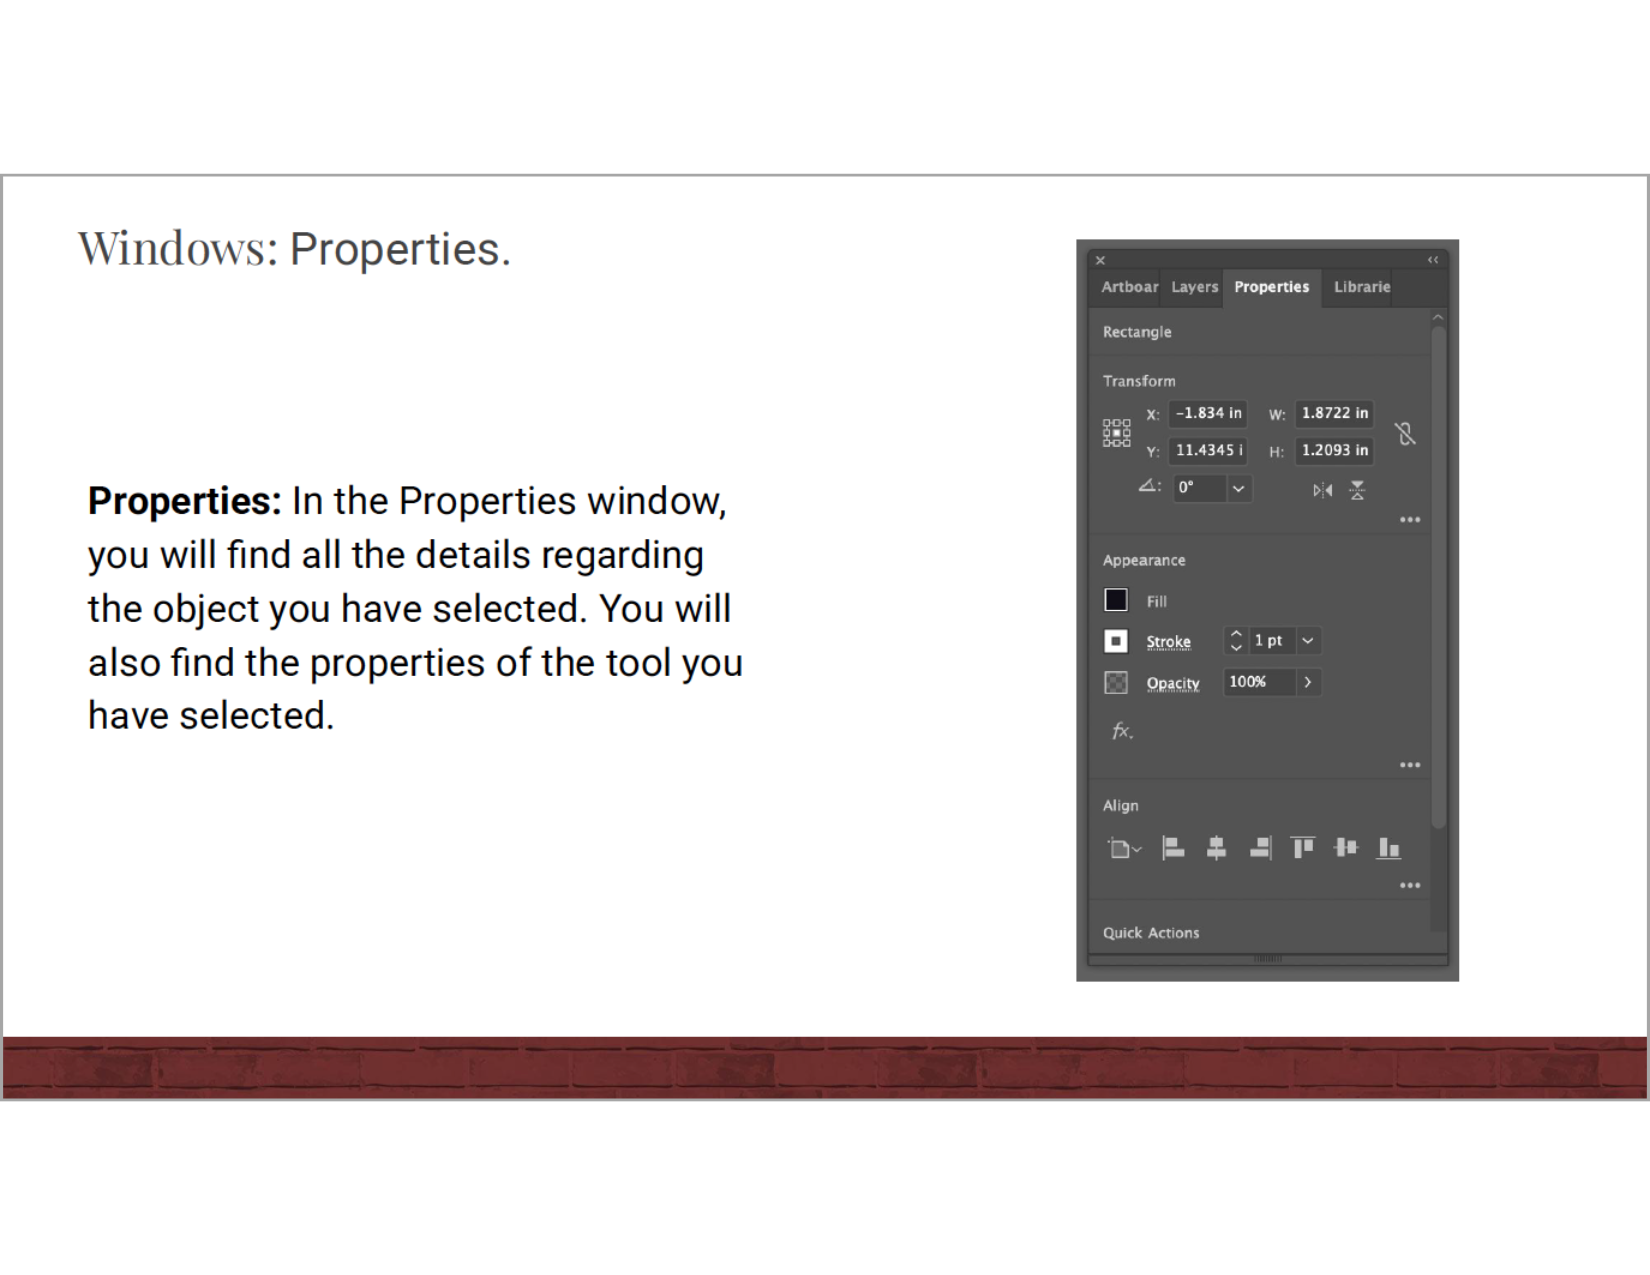
- Most used windows
- Artboards, layers, properties, and libraries.
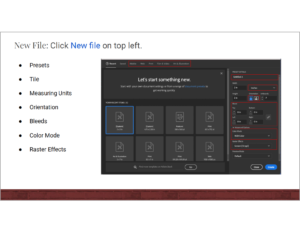
- Demo
- In the demo, you will create a new document, place an image, trace an image with a pen, change the shape color, use a paintbrush, add text, and save the shape and colors in the library.
- How to export
- Learn how to export based on how the file will be used.

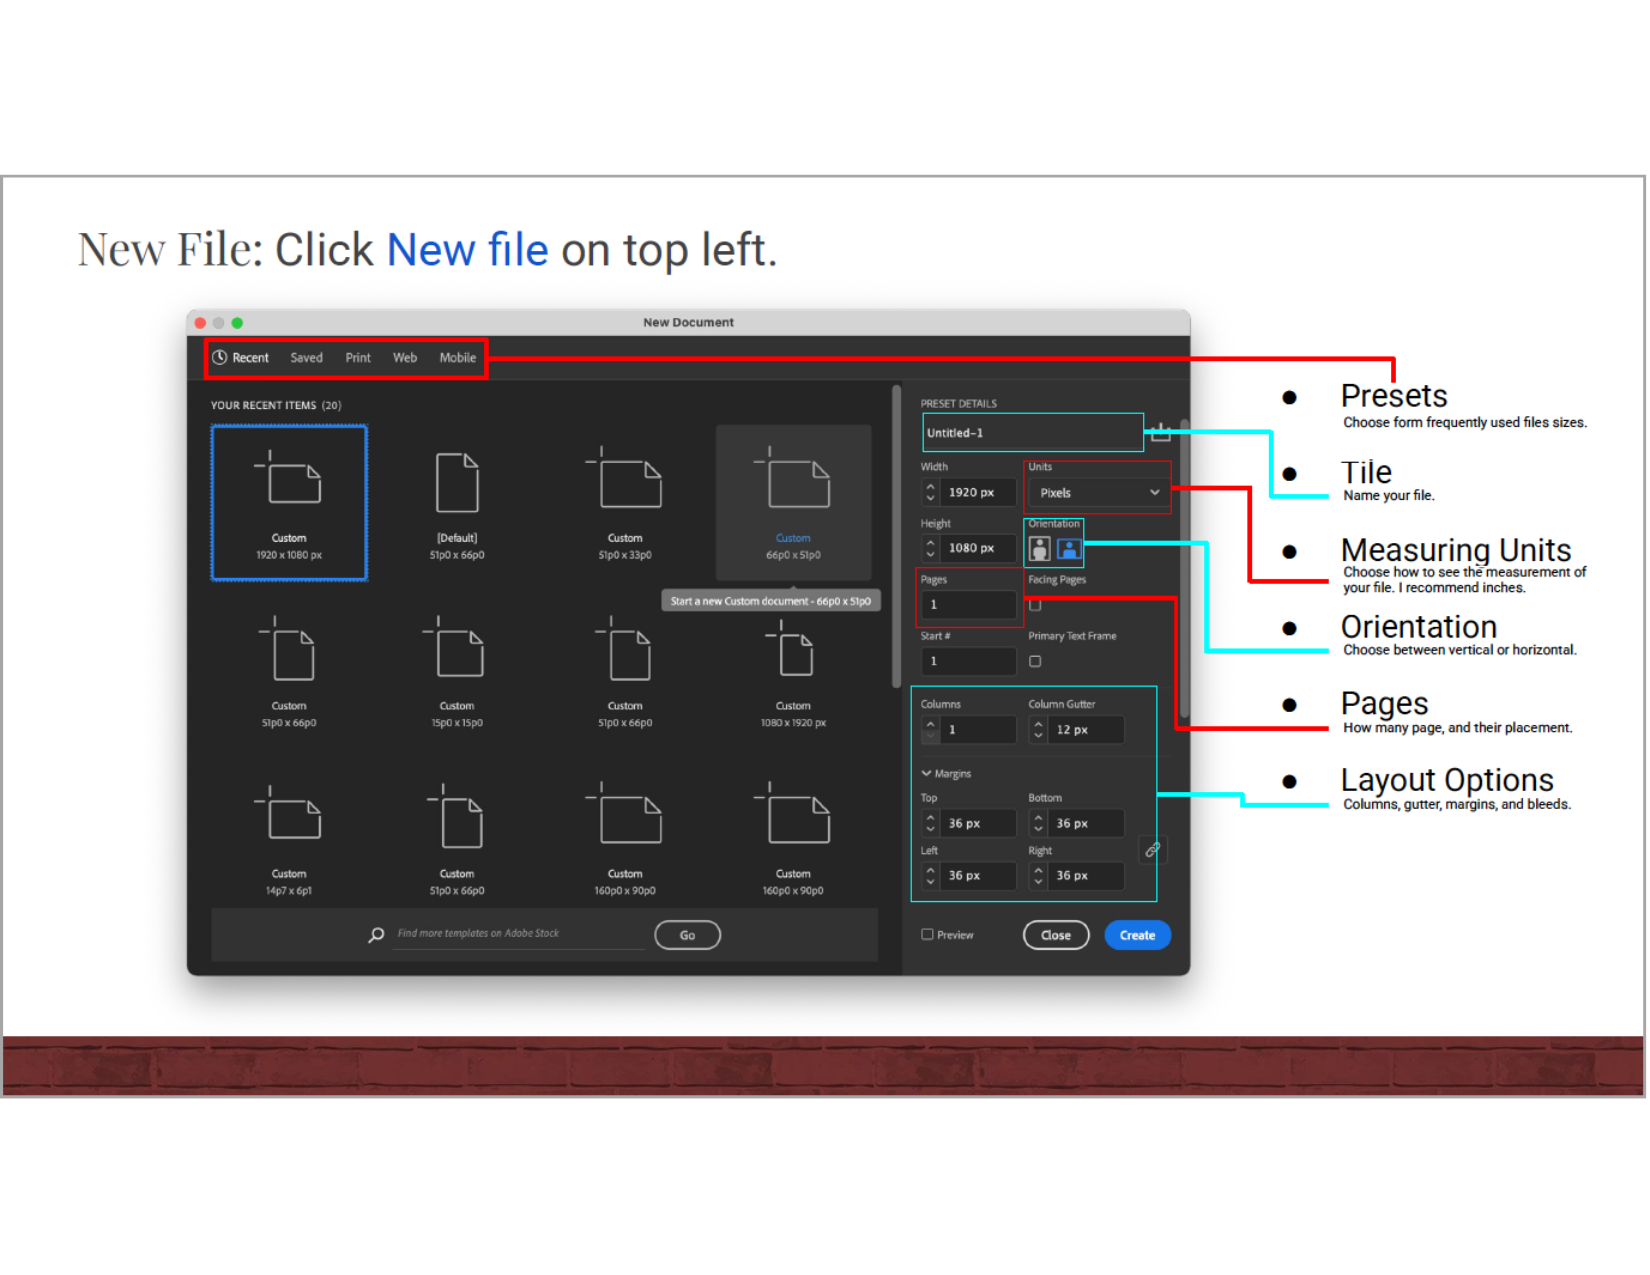
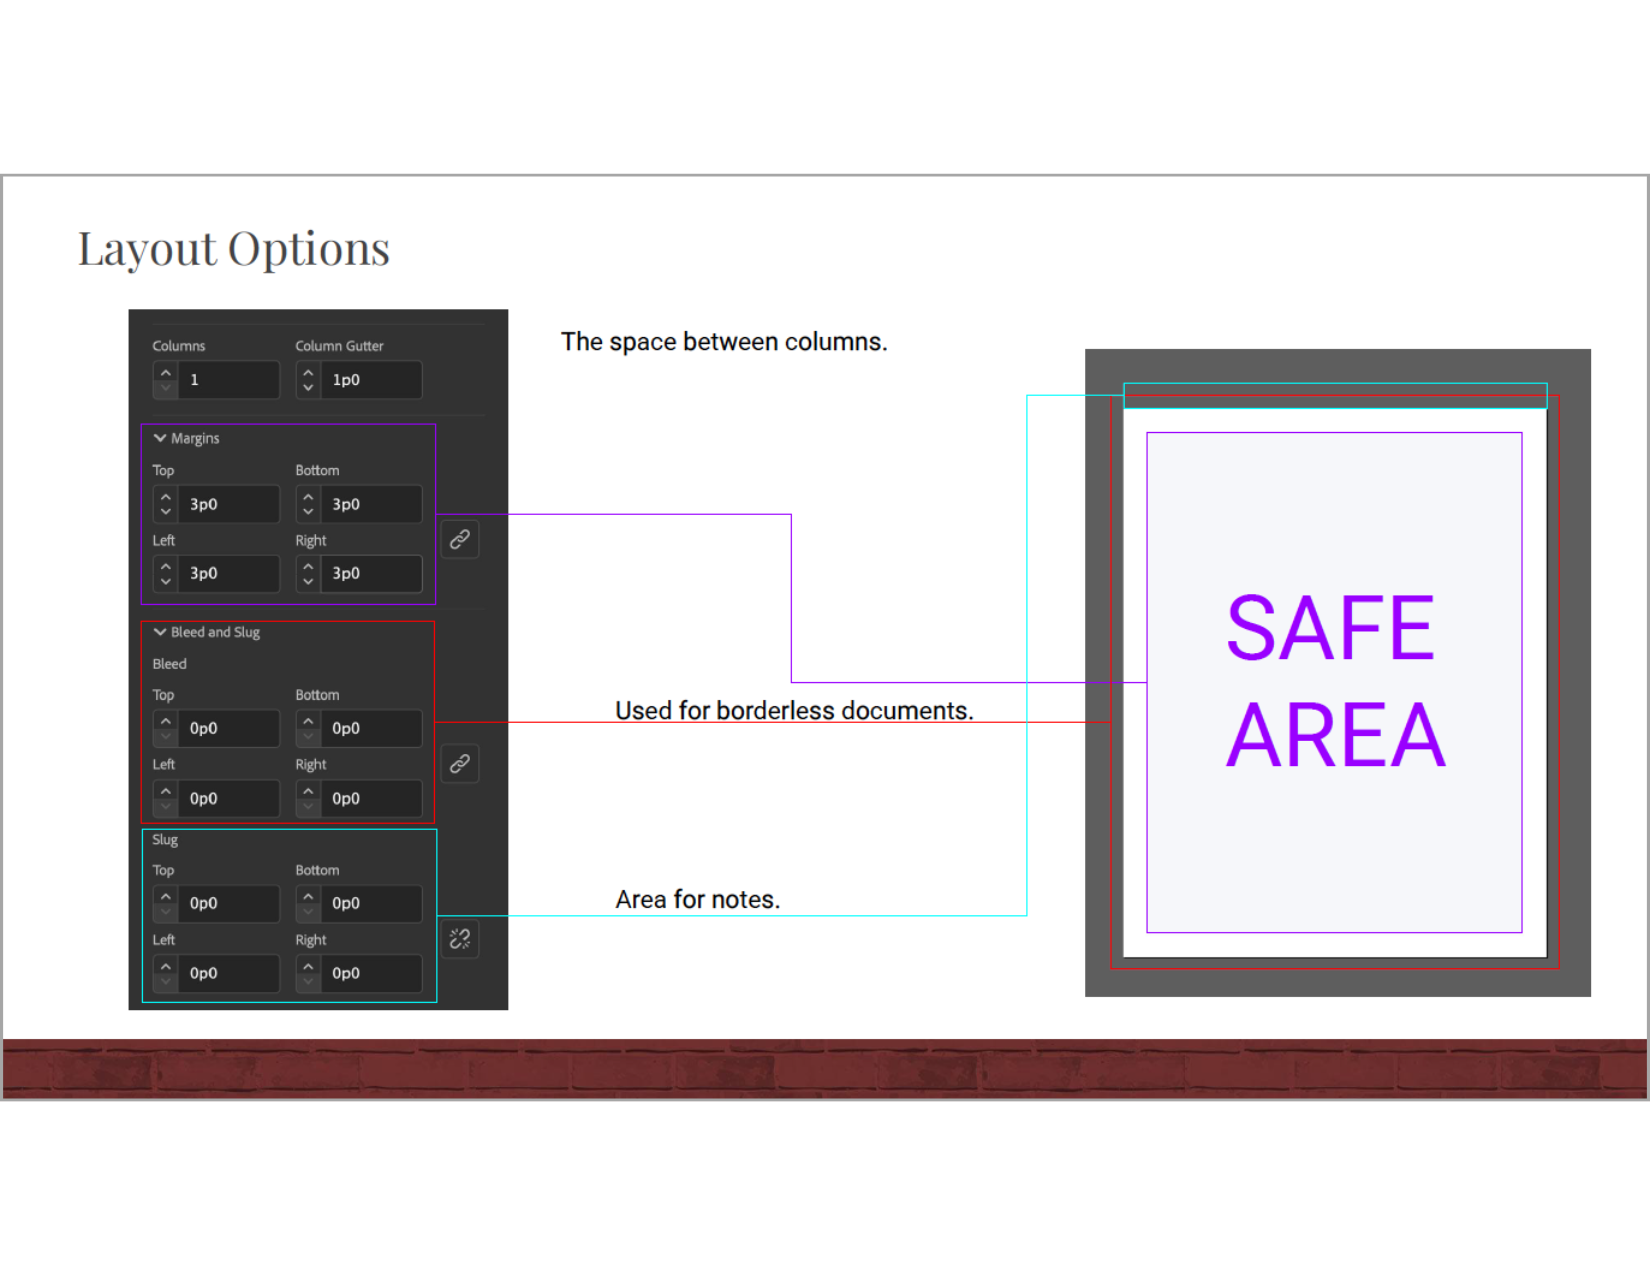
Adobe Indesign
Training Overview
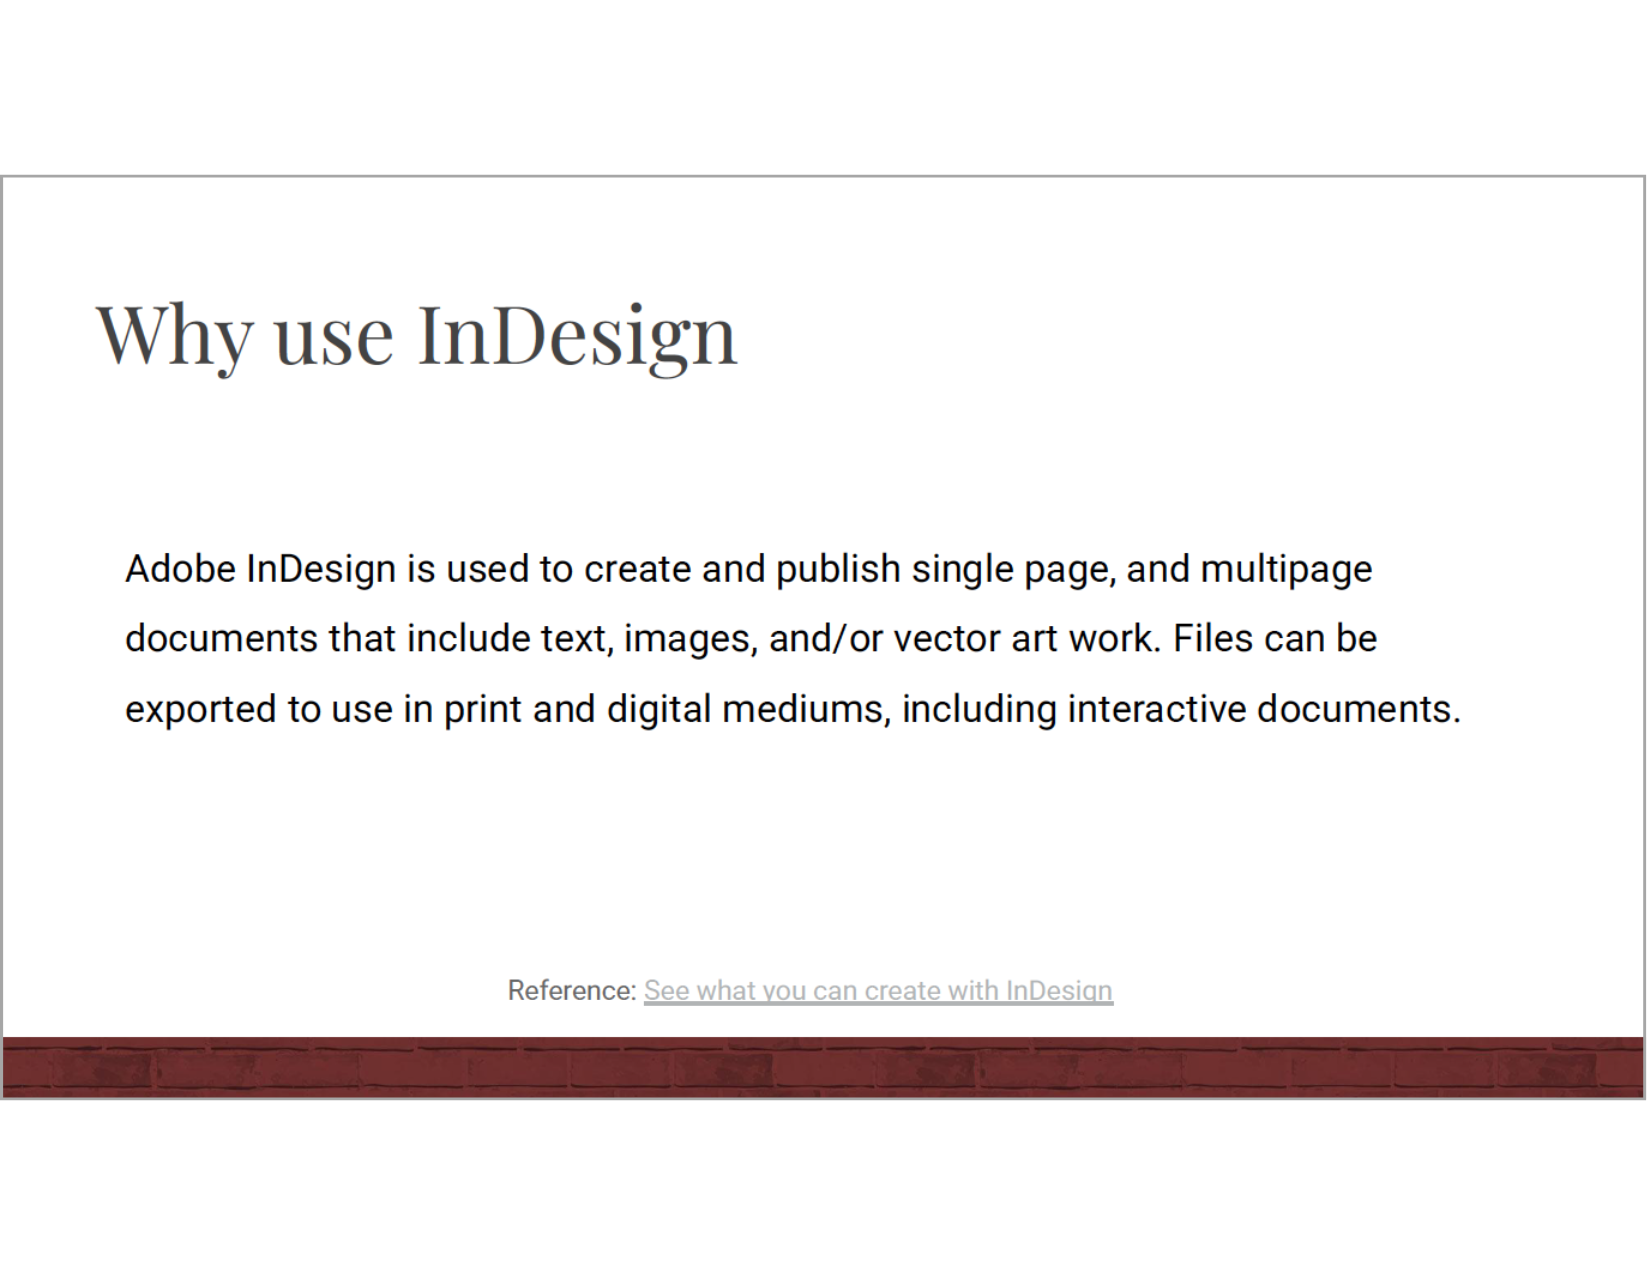
- Why use Adobe InDesign
- Most used tools
- Selection, Direct Selection, Type, Pen, Rectangle, Eyedropper, Hand, Fill, and Stroke.
- Most used windows
- Pages, properties, and libraries.
- Demo
- In the demo, you will create a new file, add text using the text tool, select a font, and a size. Use the type tool and insert placeholder text. Place the image and change the size. Using the rectangular tool, add a rectangle and copy, change the color of the rectangle using the eyedropper and selecting a color from the image. Using the ellipse tool, create a circle and copy. Using layers, rearrange shapes.
- How to export
- Learn how to export based on how the file will be used.


Adobe Photoshop
Training Overview
- Why use Adobe Photoshop
- Most used tools
- Rectangular Marquee, Lasso, Magnetic Lasso, Quick Selection, Eraser, Spot Healing Brush, Clone Stamp, Crop, Blur, and Sharpen.
- Most used windows
- Demo
- In the demo, you will create a new file, place an embedded image, rasterize, transform the image, and scale. Using the rectangular marquee tool, select areas and delete. Use the lasso, magnetic tool, and quick selection to make selections and feather them. Use the eraser tool and change the brush size and strength. Use the stop healing tool and the clone stamp tool. Use the blur, sharpen, and crop tool. Use an adjustment layer to finish.
- How to export
- Learn how to export based on how the file will be used.